SmartTruckRoute Vehicle Tracking
The development team of the SmartTruckRoute app is pleased to offer a low cost,
easy to use vehicle tracking targeted to small and mid-sized fleet owners. Tracking
works in the background once the driver agrees to turn on the feature. Rest
assured that data usage is very limited and will not significantly impact cell
phone data usage. The feature is very easy to use and does not require the professional
driver to install a separate application.
How it works:
- Download and install SmartTruckRoute app onto the device you wish to track.
- Purchase a vehicle tracking license. (Note that Vehicle tracking can be used with or without a routing subscription as the two subscriptions are independent).
- Launch SmartTruckRoute on the device to be tracked.
- Select Settings, Route Configuration, and turn on "Tracking". Enter "02108" to unlock the feature and then email the device tracking number to apps@smarttruckroute.com. Once we receive it, we will activate the app and begin transmitting the position of the moving vehicle.
- Fleet manager checks position of the vehicle by visiting www.smarttruckroute.com/track and logging into the system. The tracking display (of each subscribed vehicle) will be updated based on speed of travel and distance travelled.
To purchase a monitoring subscription:
- Contact TeleType Company 786-445-0822 (call or text) for a quote.
- Retain your receipt from the shopping cart which will contain a link with user name and password allowing you to login and monitor each subscribed vehicle.
Monitoring vehicles (central station):
- Open your browser to www.smarttruckroute.com/track
- Enter the user name and password that were sent to you once you confirmed your order for vehicle tracking
- Click on "Add" on the upper left and enter the name you want to give to your vehicle and identifier number that the driver will supply. The number from the driver will appear under option “Tracking”. You could also add extra details such as Group, Phone, Model, Contact, and Category by clicking "Extra".
- Edit allows you to modify the name of your vehicle, ID you track, and extra details.
- Remove will allow you to remove the vehicle from your list
- Geofences will allow you to enable geofence objects that you've created for specific devices
- Command will allow you to send custom commands to specific devices. More info here.
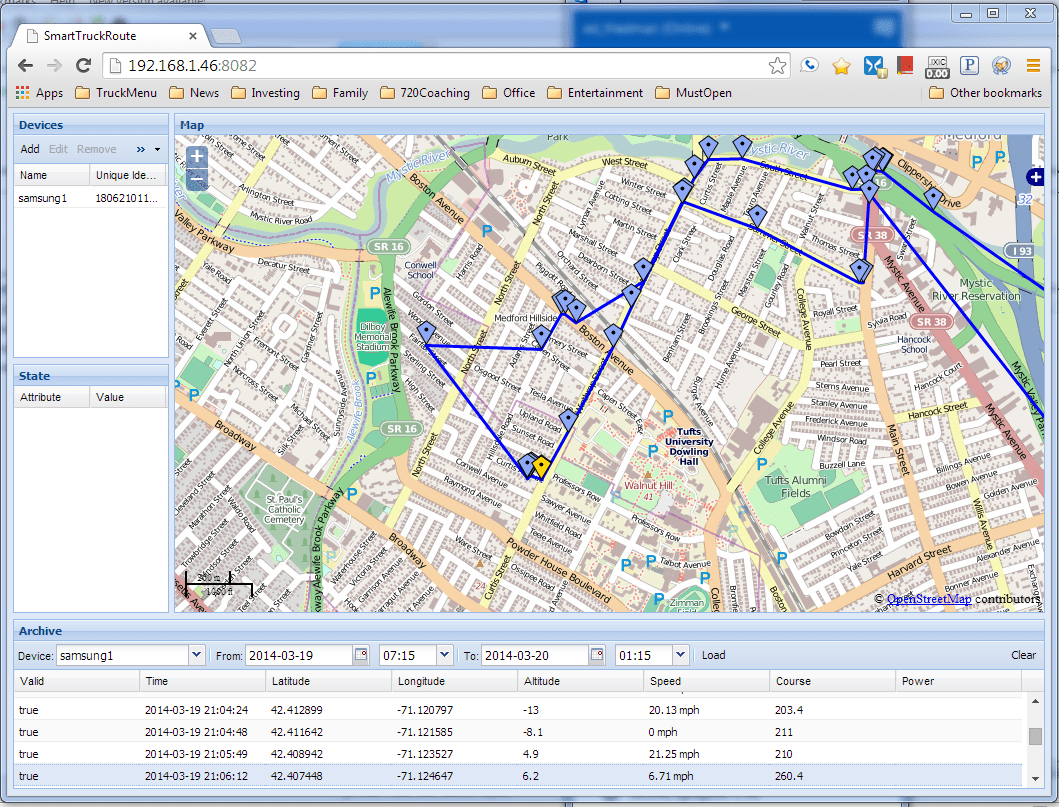
- Selected devices will show up in green, current position in red, and past position in blue
- To get past positions fill the form on the bottom of the page and click "Load"
- All times are displayed in UTC
Monitoring settings:
- Above the map, you can toggle on and off geofences, live routes, follow, and notification sounds.
- Under settings, you can change your account information, groups, geofences, server, users, notification settings, attributes of devices, view the total distance per device, device statistics between dates, ics calendars, and logout.
- Account allows you to modify your password, phone number, map layer, measurements system, starting user position, zoom, time format, coordinates format, timezone, and permissions.
- Group allows you to group devices for management or sharing.
- Geofences allows you to monitor devices entering and exiting the geofence. More info here.
- Server allows you to change the server's map layer, set Bing Maps key, custom maps, change distance and speed measurement systems, starting user position, zoom, time format, force settings, coordinates format, timezone, and permissions.
- Users allows you to manage users; account information, geofences, devices, groups, notifications, and calendars. More info here.
- Notifications allow you to manage the way you get notified about events. More info here.
- Attribute aliases allows you to manage and rename position properties for devices.
- Device Distance allows you to modify the total distance per device.
- Statistics allow you to view the statistics of managed users/devices between dates, such as the capture time, active users, active devices, requests, messages received, and messages stored.
- Calendar allows you to limit geofences to a particular time or schedule. More info here.
- Logout allows you to logout your account.
Monitoring reports:
- Under reports, you can configure and display Routes, Events, Trips, Summaries, and Charts for your devices or groups.
- Configure allows you to modify the devices, groups, chart types, markers, and date range for your reports.
- Show allows you to display your reports.
- Clear allows you to clear the results of your reports.